Showing posts with label kids. Show all posts

Monday, January 18, 2016

She's Sixteen

Have you played along with the Paper Issues Sketchy Saturday sketch yet?

I used the remnants of my Simple Stories I Am collection to document Isabelle's 16th birthday celebration with a few of her friends.

The girls had a blast.  We rented a limo for them to be chauffeured downtown to a fantastic new restaurant called Across The Board where you can have dinner and enjoy one or more of their 1500 board games with your group over the course of a 3 hour table booking.  They came back here later for cake and snacks, hot tubbing, giggles, and chit chat.  I loved that it was more of a grown up birthday party.
This collection comes with so many embellishments that it was easy to layer to my hearts content.

Here is the sketch created by the talented Amy Coose. 

For a chance to a Paper Issues gift certificate get over to the Paper Issues Friends and Fans Facebook page and link up your take on the sketch in the January Album.

Thanks for stopping by today friends! Pin It

Monday, December 28, 2015

Believe In Magic

For us, it's not Magic Kingdom that is the Happiest Place on Earth, but Universal Studios!

I love that this place has my girls living unleashed, and with abandon.  Free to have fun, without reservation, or concern of what other people may think about their love for pure kid-like fun.

These pix of Belle make me so happy.  I love that even at 16 she is not embarrassed to have her photo taken with the Grinch.  She was thrilled, in fact to pose for a photo.
Look at the sheer joy on her face in the photo above.  She was tickled pink for the moment she had, just her and the Grinch.

The hidden journaling records my feelings about this brief moment in time.

I just love this Say Cheese II Collection by Simple Stories.  It is perfection for documenting all things Disney.

I sincerely hope there is at least one more trip to this magical place in this family's future!

Thanks for popping by today friends!

Pin It

Monday, November 23, 2015

Autumn Together

Today over on the Paper Issues Blog we are revealing part 2 of the Let Me Espresso My Gratitude.

I focused on my girls for this one.  I just love the Simple Stories Pumpkin Spice collection, and jumped at the chance to use it with these gorgeous photos we stopped to take at this old abandoned barn off the highway on the way to Mom and Dad's.
These girls are my whole life.  They keep me busy with their bigger than life personalities, and social calendars but I wouldn't have it any other way.

The ephemera package in the collection were great for embellishing this layout using several pieces of 3D adhesive.   

I used my sewing maching to add a little texture and dimension to this layout.  Just love the way it looks.

I would love to see some of you link up your projects focusing on things you are thankful for, or coffee (favourite flavors, stains, stamps, cups, etc), you may even choose to use our free November printables.  Link ups may be new, but do NOT have to be, and every link up will earn you a chance at a $20 gift certificate to the Paper Issues store.

And don't forget if you're in the mood for a little shopping to use code:SHERRI, you'll save 20% off everything in your cart.
Thank you for popping in today friends Happy Monday! Pin It

Wednesday, August 26, 2015

Beach Babies

It's been awhile since I've had a chance to play with a Swag Bag, and the The July Swag Bag reminded me of how totally awesome they are.
This photo of my youngest two popped up in my Timehop feed a couple weeks ago, and it brought back so many warm and fuzzy memories of when my babies were babies, that I was compelled to scrap it again.  I can remember this day at the waterpark as clear as day.  It was so terribly hot, and we just had to get out and find some relief.  The girls were so busy having fun in the water that they were a little grumpy about having to stop and pose for me.

The July Swag bag is a glassine bag full of summer awesomeness.  This page came together in about 20 minutes.
The whale and the fishie flair were a perfect way to ground the layout, since the water theme is what the photo was all about.  The outdoors acrylic piece is from Color Cast Designs, a great little shop owned by a Paper Issues friend of ours.

Everything on this layout from the patterned paper pieces to the journaling card, to the chipboard frame, to the teeny tiny enamel dots, to the gorgeous gold glitter bow are all from the July Swag Bag.  My favourite little piece is the felt anchor PaperPop by Parker On The Porch.  If you have yet to try out a Swag Bag this is a great month to give it a go, and there are still a few left in the shop.

Here is is what's in store for you.
You can get your hands on one right here in the Paper Issues store.  Use code:SHERRI to save 20% off, in fact you can save 20% off of everything in your cart with my code.

Happy crafting friends! Pin It

Friday, July 10, 2015

Framed Memories

This week I put my love of scrapping to use in the home décor department, and created a couple of pieces to hang in my baby girl's room, in memory of her fun little birthday party photoshoot with friends.

I grabbed a few items from the new Fancy Pants Designs Summer Sun Collection, and set to work.
Items I used include:
2 - inexpensive black frames
Flair
Wood Veneer
Tags
Insta Pack
Ephemera Pack
Alphabet and Numbers Pack


Using one of the tags I layered bits and pieces onto it documenting the year of the photo, and using some Zing to emboss the largest "girlfriends" cut in the package.  I love that the wood veneer sentiments come in both large and small sizes.  This larger one, made more of a statement on this over sized project.


I chose a different tag and repeated the same process for my second picture frame, this time adding a piece of flair to the cluster.


These frames look great on Eden's wall, and were so easy to create, I'm sure next year we will swap them out for new photos and an updated Fancy Pants Designs collection.
Pin It

Wednesday, July 8, 2015

Summer Vibes

There have been so many great summer collections released this season.  
The Simple Stories Summer Vibes Collection is the perfect blend of vintage and summer fun. 
A few of the Paper Issues Design Team joined me in showing it off today.

My layout was a 20 minute easy peasy project.
Once I chose the 12x12 fundamentals stickers to use as my main source of embellishments everything came together pretty quickly.

Have you been using this great new Summer collection?
We would love to see what you've been creating, link us up in the comments and we'll leave you some love.  
The store is also carrying the newest Simple Stories collections So Rad, and So Fancy.  Both are fabulous gender themed collections, great colours and great embellishments.  See all the new recently added shop items right here.  Remember to use code:SHERRI at checkout to save 20% off everything in your cart.

Happy scrapping friends!

Pin It

Friday, June 26, 2015

Let's Celebrate

Today I am sharing the last of my Paper Camellia June projects.
My baby girl turned 12 a couple of weeks ago, and that, of course called for a page in her honour.  
The June Paper Camellia kit was packed with so many gorgeous Pink Paislee chipboard pieces that I built my page entirely around them.  
Layering and more layering was the recipe for getting as many fabulous little pieces onto one page. How fun it was to mix so many patterns too.  It's easy to do if you keep everything in moderation, not using competing patterns in close proximity.

If you look close enough here you will notice that the photos were printed just a tad smaller than the frames.  The layering and added embellishments, both hide the empty space, and add to the fun and flow of the design.

To keep the top frame cluster level I used a few 3D foam adhesive pieces underneath, they will help hold the bulk securely in place.

Lots of journaling on this page.  I really wanted to share the story of my girl at 12, and the way she fits so perfectly into our lives with her sweet, silly girl, funny self.

I have been blessed to have had the opportunity to be a part of the Paper Camellia team over these past 6 months.  Ria and Amy have been wonderful leaders and super supportive of the decision I've made to take an early departure from this wonderful team.  This girl of mine, her two sisters, and their dad are needing me to be a little more free around our home.  It has been a whirlwind of a season around here, lots of changes for all of us, including my going back to work full time.  It's pretty incredible the way a life can change so dramatically within 6 months.  Thank you Ria for inviting me into your fold, and allowing me to show off your gorgeous kits.  I will be forever grateful for the opportunity to show off your kits, and for the trust you placed in me to do so well.

Pin It

Monday, June 15, 2015

That Thing You Do

Even though the girls are in so many dance throughout the competition season.  The days of competition are so rushed between work, and school, that I often don't get photos of all their costumes.  This is where other moms, and the studio directors come in, they often catch a group shot that I wasn't around for, and this is one of those photos.
This photo totally encapsulates the feel of the dance they did too.  They danced to The Wonders "That Thing You Do".  Such a catchy little tune.

I finally broke out my Evolution Advanced die cutting system by WeRMemory Keepers, and put this gorgeous Heidi Swapp file to use.  Just love how it's literally her hand writing.  It totally compliments the Pink Paislee Citrus Bliss collection too.


More hidden journaling.  I've said it before, and I'll say it again, the story is the most important thing on my layout.  All the layeres and ephemera in the world don't make up for the story behind the photos.  Years from now all the "stuff" on my pages will look old and dated, but the story will be as relevant then as it is today.  With so many untold stories that died with my mother, I am fiercely passionate about documenting the who, what, when and where behind my photos.

If you still haven't managed to get your hands on this collection, be sure to stop by the Paper Issues shop.  Use code: SHERRI at checkout to receive 20% off everything in your cart!

Thanks for popping by today friends! Pin It

Friday, June 12, 2015

Meeting Les Twins

I am sharing the tutorial on how I created this layout up on the Paper Camellia blog today.

Théa was so stoked to have taken a last minute class last summer with 4 of Beyoncé's back up dancers.  Les Twins are HUGE, in the dance world, seriously look them up on Youtube, they will amaze you with their mad skills.

I will never know how the last minute class was arranged with this generous group of dancers the night before Beyoncé's big concert here last summer, but it was pretty exciting to watch my kid moving and grooving right along with the challenging routines she was learning.  Watching the freestyle portion at the end was a blast.

Everyone was kind enough to hang around after the workshop for photos and autographs. Les Twins said she had skills, and loads of talent.  Pretty amazing of them to say being who they are and who they work for.  Can't believe it's taken me so long to document the event.

Hop over to the Paper Camellia blog to get the basket weave tutorial and see close up shots.


Hope you're in for a great weekend friends.  Thanks a bunch for stopping by today! Pin It

Tuesday, June 9, 2015

Inspired by Pinterest

I recently found the coolest design on Pinterest, and was determined to try and recreate it on a scrapbook page using Fancy Pants products.

I grabbed these supplies, and set to work.

First, I punched out 14 squares using my Recollections 1-3/4" square punch.  I then used my distress tool to ink each edge.

I then lined them up into 4 rows, and added 3D foam adhesive to the sides in the row that touched, like this.

Throw on a few coordinating elements, add some journaling, and voila I've created a page that falls way outside of my proverbial box.

I am pretty pleased with the outcome, if I do say so myself.

I sure appreciate your taking the time to drop by today friends!

Pin It

Monday, April 20, 2015

Altered ribbon spool - tutorial

Hi friends,

I wanted to share a tutorial I had up on the Fancy Pants blog recently.  It is a clever little altered project that popped up in my Pinterest feed a while back.


I started with this simple spool of ribbon 1.5" ribbon, that I picked up at the Dollar store, and a couple of embellishments from the Flutter collection that I thought I may want to use. 


To begin, I removed the entire length of ribbon form the spool, and then used my craft knife to separate the "lid" or top portion (where the price tag was located) from the spool itself.  This will expose the round cavity in the center that makes up the spool on which the rioon in wrapped.  I then decorated that top portion by cutting a round piee of patterned paper just slightly larger than the top of the spool to make it easier to act as a lit.  Cutting this piece larger than the "lid" itself, also gave me more space on which to add my embellishments (see the 1st image above).  You can also see in the photo above that I decorated the bottom of the spool in the same manner, and covered the plastic spool section with a strip of patterned paper.  


To create you photo strip, simply cut your selected photos into circles small enough to fit inside the cavity of the spool.  In this case my spool was slightly larger than 2.5 inches, therefore my photos measure exactly 2.5 inches in diameter.  Cut the same number of circles out of coordinating patterned paper, to act as the backing to your photos.

Remember that ribbon you removed from your spool?  Grab it and lay it down on your work surface.  Measure about 2 inches of ribbon and mark that spot.  It is at this point that you will glue the top of your newly altered lid.  Next to that, leaving very little space in between, begin to glue down your photos, neatly and straight, keeping the ribbon lined up directly in the middle of each photo.  


Notice that I cut just a few more blank pieces of cardstock to act as journaling cards, randomly placed in between some of my photos.  I even decided to make a title page to my album, as it just made the album seem more complete to have one.  

This is what the back side of my photo strip looks like.  Nothing fancy, just coordinating patterned papers from the Flutter Collection backing my photos.

Once all your photos and backing are added to your ribbon strip fold them up accordion style, like this, and tuck them into your newly altered ribbon spool container.


And there you have it, a sweet little photo box of sorts to store all your precious photos, and memories from a noteworthy even in your family.  This one is currently being loved and adored by my girl.  Thirteen is a pretty special birthday, and this little photo collection captures all the fun, and giggles, stories, and gifts, food, and friends with whom she got to share her special day.  

Thanks for stopping by today friends!


Pin It

Monday, April 13, 2015

Hello My Girl

It has been awhile since I played along with an Issue on the Paper Issues blog, and this one was worth the wait.  As you know I love kits, and this month I was happy to be included on this Issue as we have teamed up with Scrapbook Circle, using their March Main kit, March Printable, and cut files.

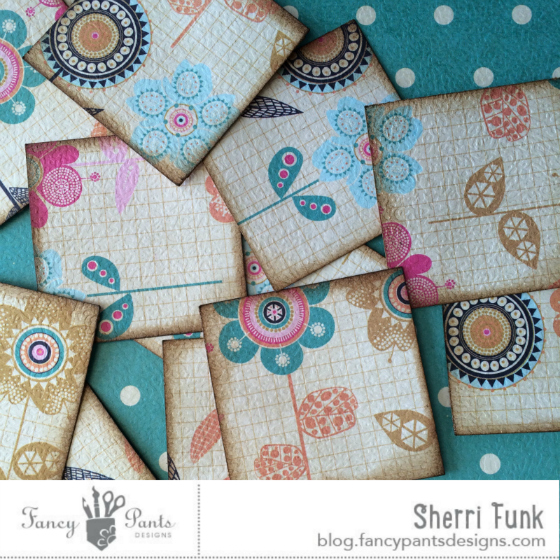
That acrylic Hello is my absolute favourite item in the kit, I based my entire design around that, and that super cute & whimsical background paper.

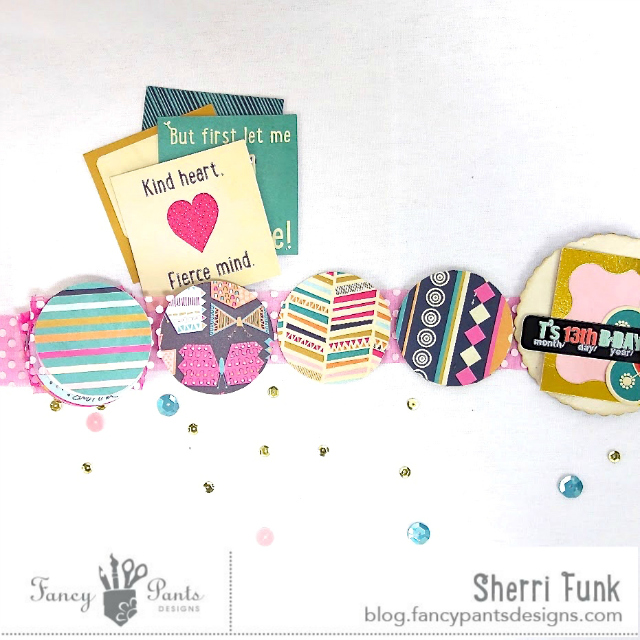
Just look at the detail on that patterned paper, it truly does look like I stamped all those details.  You should know me well enough by now to know how ludicrous it would be to give that idea more than a nano second of thought. That "enjoy today" is one of the  cut files from the kit.  I added a stitched circle to me design as I felt it helped to ground my design with so much going on, on the page.  The Janome  sewing machine that I won from Scrapbook and Cards Today last year had no trouble stitching right through the Pinkfresh wood veneer piece.

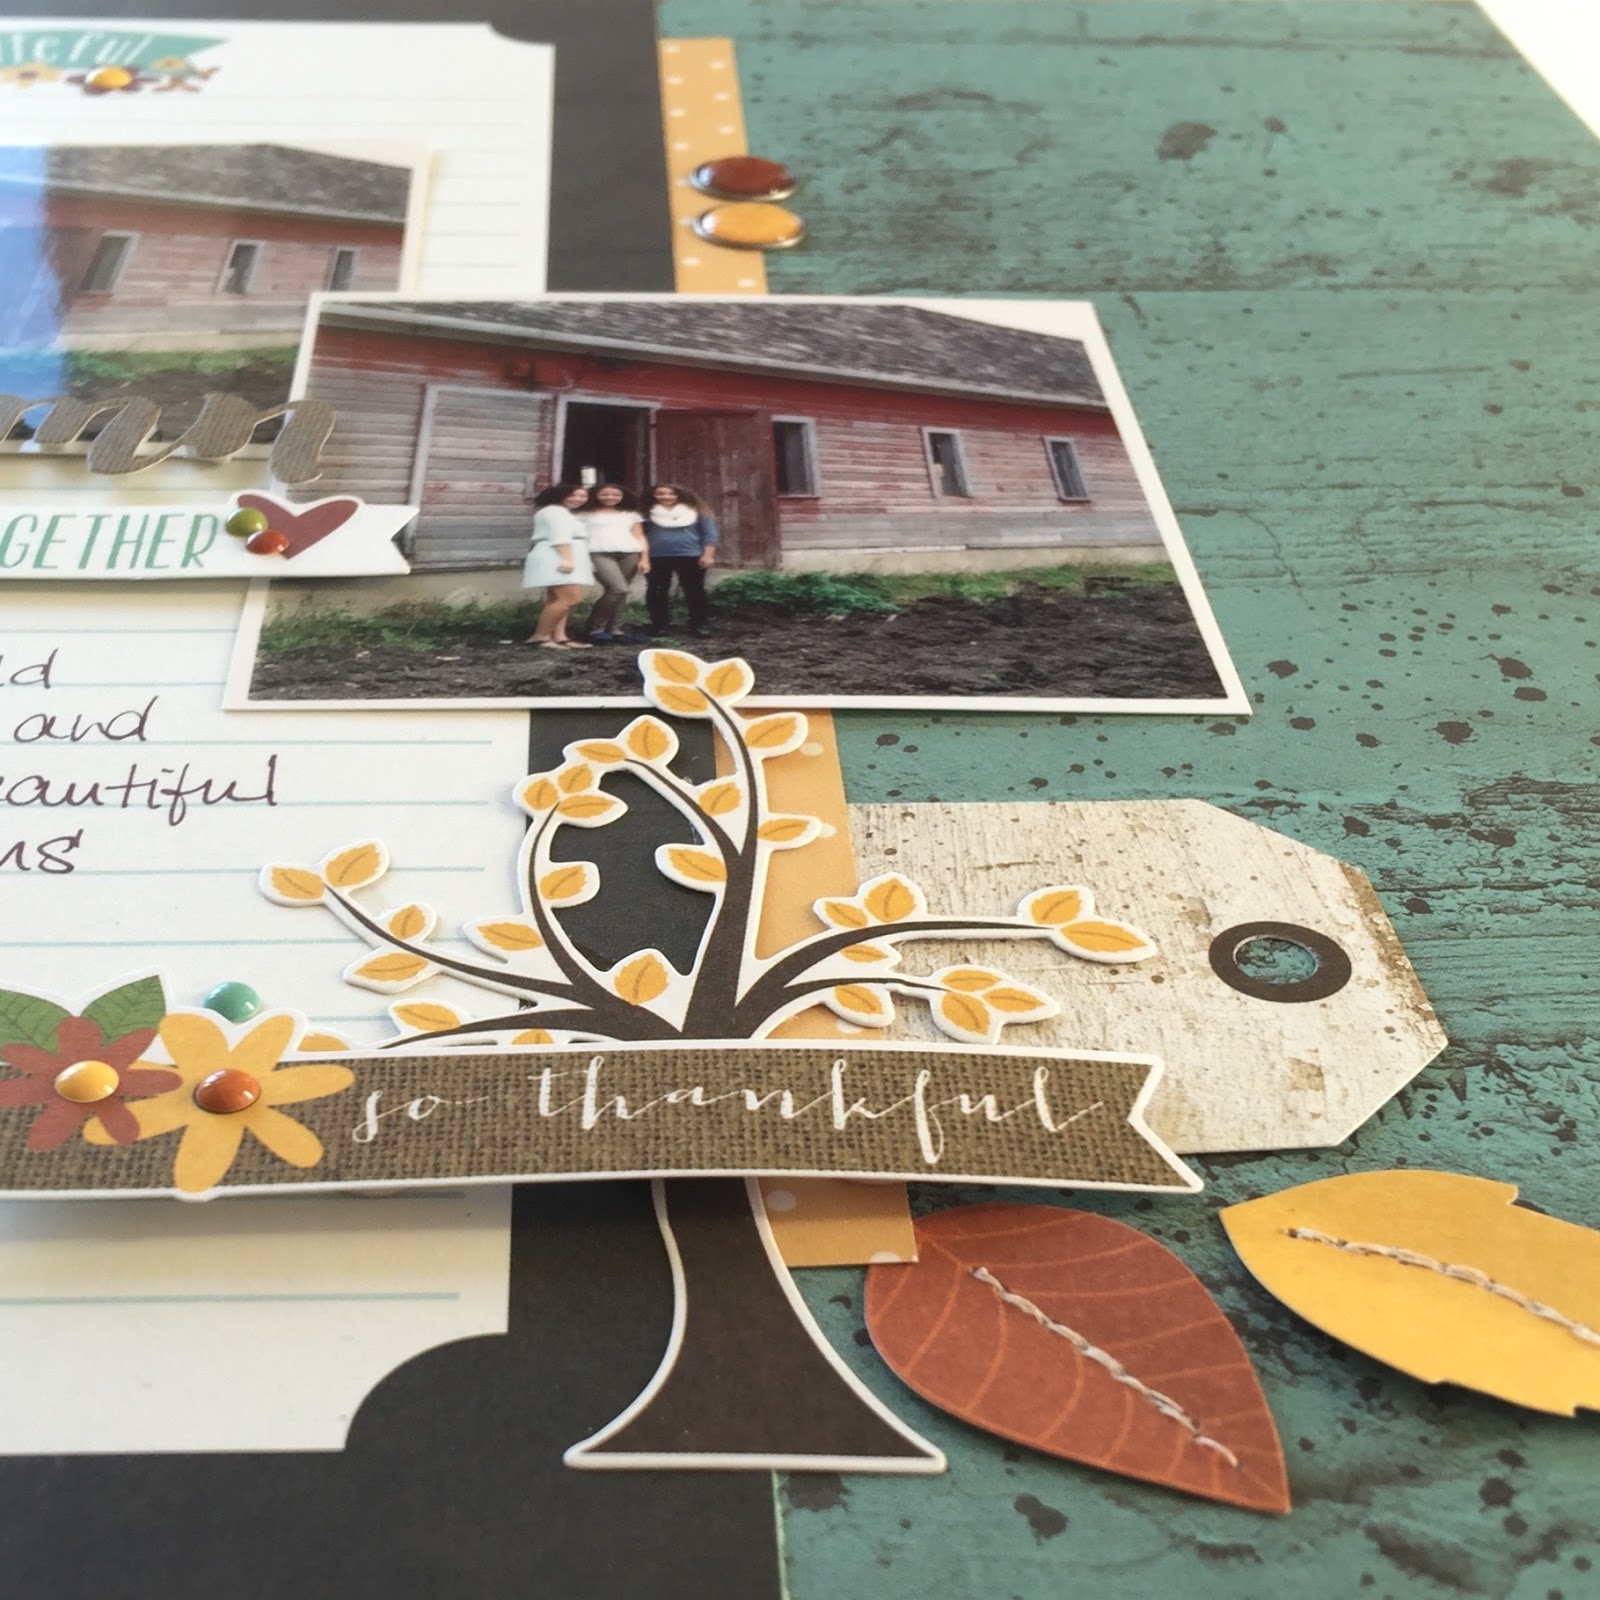
That great little kraft bag was part of the kit, and I added a kraft tag from my stash, on which to record my journaling about this photo.  It was a special little moment shared between Théa and I as she was waiting for her Tap Small Group session to being at Dance Competition a couple of years ago.  The cork pieces were another favourite from the kit.

Here is the March Main Kit in it's entirety.  So many great coordinating papers and embellishments, and it could be yours.

Simply link up to our Prints Charming's Beautiful Papers here on the Paper Issues Blog. As always, there are plenty of prompts to use to get the mojo going.  Your projects do not have to be new, and you may link up as many times as you would like.  One lucky winner will be randomly selected to receive this great kit.

And if you're in the mood for new scrappy goodies, there is much to be had in the Paper Issues store.  Did you notice that the new Fancy Pants collections are now available?  And then there's this super cute Kelly Purkey stamp, that is screaming for me to break open and get using.  No matter what you end up picking up, be sure to use my code to save 20% off everything in your cart.

Thanks for stopping by today friends! Pin It

Friday, April 10, 2015

Celebrating Thirteen

I have a teenager.  A second one, in fact.  When did I become so old?  I don't feel it (at least not most days), but it's a fact my sweet little Bean turned 13 recently.
She chose small and simple.  Five friends and bowling, followed by cake and gift and a sleep over.  It was easy peasy, my favourite kind of party.  My girls will not grow up remembering the amazing parties I threw them as they were growing up.  No, but the will hopefully remember the way I loved their friends.  They way I encouraged them to make our home their home.  And these 5 girls were no exception.  Théa has made such great decisions with her friend choices.  These girls are sweet, and kind, and respectful, and just enough crazy and loud for her personality.  Having them over for the night was a no-brainer.

I recently spoke about my rule of how to create great layers that work.  Here is another example: six layers that don't add a lot of bulk to my page because they are different sizes and shapes.

I have found that a great way to adhere the acetate sentiments is to add thin strips of double sided adhesive behind the thicker portions of the font, so it is completely invisible from the front.  In this case I used one that is a 1/8" width. It' super tacky, so therefore I really didn't need too much to ensure a good hold to my patterned paper. 

My layout is based on the April Sketch.  You still have a little time to link up your own take in the comments on this post for your chance to win a $10 gift certificate to the Paper Camellia store.

Thanks for stopping by today friends!
Pin It