Showing posts with label Altered project. Show all posts

Monday, April 20, 2015

Altered ribbon spool - tutorial

Hi friends,

I wanted to share a tutorial I had up on the Fancy Pants blog recently.  It is a clever little altered project that popped up in my Pinterest feed a while back.


I started with this simple spool of ribbon 1.5" ribbon, that I picked up at the Dollar store, and a couple of embellishments from the Flutter collection that I thought I may want to use. 


To begin, I removed the entire length of ribbon form the spool, and then used my craft knife to separate the "lid" or top portion (where the price tag was located) from the spool itself.  This will expose the round cavity in the center that makes up the spool on which the rioon in wrapped.  I then decorated that top portion by cutting a round piee of patterned paper just slightly larger than the top of the spool to make it easier to act as a lit.  Cutting this piece larger than the "lid" itself, also gave me more space on which to add my embellishments (see the 1st image above).  You can also see in the photo above that I decorated the bottom of the spool in the same manner, and covered the plastic spool section with a strip of patterned paper.  


To create you photo strip, simply cut your selected photos into circles small enough to fit inside the cavity of the spool.  In this case my spool was slightly larger than 2.5 inches, therefore my photos measure exactly 2.5 inches in diameter.  Cut the same number of circles out of coordinating patterned paper, to act as the backing to your photos.

Remember that ribbon you removed from your spool?  Grab it and lay it down on your work surface.  Measure about 2 inches of ribbon and mark that spot.  It is at this point that you will glue the top of your newly altered lid.  Next to that, leaving very little space in between, begin to glue down your photos, neatly and straight, keeping the ribbon lined up directly in the middle of each photo.  


Notice that I cut just a few more blank pieces of cardstock to act as journaling cards, randomly placed in between some of my photos.  I even decided to make a title page to my album, as it just made the album seem more complete to have one.  

This is what the back side of my photo strip looks like.  Nothing fancy, just coordinating patterned papers from the Flutter Collection backing my photos.

Once all your photos and backing are added to your ribbon strip fold them up accordion style, like this, and tuck them into your newly altered ribbon spool container.


And there you have it, a sweet little photo box of sorts to store all your precious photos, and memories from a noteworthy even in your family.  This one is currently being loved and adored by my girl.  Thirteen is a pretty special birthday, and this little photo collection captures all the fun, and giggles, stories, and gifts, food, and friends with whom she got to share her special day.  

Thanks for stopping by today friends!


Pin It

Saturday, March 7, 2015

Bags & Tags *Pink Paislee*

Popping in to share my very first project over on the Pink Paislee blog this week.  I was so excited, and equally as nervous to share these.  I am still pinching myself that I am really on the team of my dreams.  So happy to be sharing the experience with all of you!

Tags, ephemera and layers, a perfect combination for embellishing any project.  You will often find each of these elements on my layouts, and pocket pages.  Today I want to take them off the page, and show you how easy it is to create gorgeous little tags for use as gift bag accents.

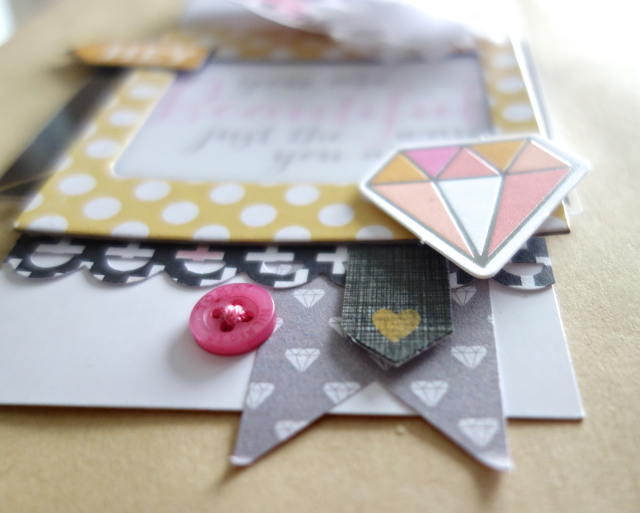
I love the mix of chucky and flat combined together. Pairing up that cute little polka dot frame, with a few strips from the 6x6 paper pad, and a few pieces of ephemera from the Bella Rouge collection is a quick and easy way to create a little beauty out of a plain old shipping tag.

Finish it off with a fabric flower and a few enamel dots, and you've got a sweet tag ready for that next unexpected gift.

Sometimes chunky looks even better with more chunky.  In this case, the sequin butterfly adds just the right amount of softness to the bulky layers of the fun and colourful chipboard pieces.

And here they are all prepped and ready for the next gift I have to give away.  It's like 2 gifts in one really, and who wouldn't be happy with that?

Thanks for popping by today friends!
Pin It

Monday, April 28, 2014

Spread Your Wings - Paper Issues Spotlight

I think I've made my first teacher gift of the year.

This 8x8 butterfly frame seemed like the perfect project for the rainbow of colours I have of the fabulous Doodlebug Designs Vellum sheets.
The vellum cuts like a charm through the paper trimmer and the Silhouette Cameo.  In this case I used my old Martha Stewart punch to create the butterflies.  I simply layered 2 punched butterflies one on top of the other and stitched them down to the cardstock.  I created the title using my Silhouette Cameo, and added just a touch of pink distress ink to the Fly for extra pop.

You'll notice there are so many colours that I haven't used (needed a much bigger frame to get them all in).  I have another idea for getting the full rainbow of colours onto one project, but you'll have to wait for that one.

The Doodlebug Sprinkles collection is so cute. You can see these vellum sheets and the rest of the bright and cheerful collection here, in the Paper Issues shop.  Don't forget to use code:SHERRI at check out to save 20% off your entire order.  US customers earn free shipping on all orders over $60 before discount.


Pin It

Friday, February 14, 2014

Happy Valentine's Day

Happy Valentine's Day friends!  

Do you celebrate this special day in your home?  If so, please share with me how you do it.  In our house there isn't a lot of fanfare.  For the past few years the girls have made little cards for their friends, and we've had make your own heart shaped pizzas in the evening.  This year things are a little different.  The girls aren't interested in handing anything out this year.  In the evening my oldest is having 4 friends over for the night, and my middle is off to her own sleep over, while the youngest is here with us.  With a house full of hungry kids I was thinking it may be easier just to make taco salad for supper.  But, now as I'm writing this, I think I'll surprise them and still do create your own heart shaped pizza.  They may be 14/15 years old, but somehow I'm thinking they'll still get a kick out of it.  And then cupcakes for dessert.  But to start the day my own girls will be getting their own little surprise.  

I made these cards with the fantastic Scraptastic February Feel Again Kit and Add On Kit.  


They will also each be receiving this bag I showed you the other day filled with these goodies.
(sorry the red background is so distracting) 
Candy, chocolate, sugar tubes, Valentine's Kleenex, a pencil, and a gift box full of heart shaped jujubes.
How cute are those heart shaped paper clips? I got a whole bag for $2 at our local grocery store.
(don't get me started on how one is not clipped properly, ugh!)  I used my Silhouette to cut out everything you see here.  This type of crafting I really don't mind.  I had some much fun cutting I kept it going with a couple of thank you gifts I need to give out today also.
I used a Silhouette cut file to cut the baskets out, and decorated them with odds and ends, and scraps I had around.  Topped them with a couple of cute VDay themed flair from {afliarforbuttons}, fill with raspberry Lindt truffles, and voila, all set. 

I also have a "love" type challenge up on the Scraptastic Blog.  It's an easy one too.  Here is a little sneak for you.
Think you can guess what the challenge is?  Hop over to the Scraptastic Blog to see the rest of my layout, and get the details for the challenge (if it's not up yet, please pop by later).  You have until March 5th to link up for your chance to win a $20 gift certificate from the store.

Thanks for stopping in today friends.  Have a wonderful weekend, however you decide to spend it. 
Pin It

Monday, February 3, 2014

Fill'er Up with Paper Issues

Our Fill 'er Up Issue is live today on the Paper Issues blog.
I had the idea to think outside to box with this issue, by keeping very literal with the prompt. Rather than a traditional scrapbook layout I decided to literally 'fill something up'.  With Valentine's Day right around the corner, I thought it would be fun to create some fun goodie bags for each of the girls.  I started with 3 plain canvas drawstring bags, my Amy Tangerine stitching template and some pastel coloured embroidery thread.  I tried to choose designs that best reflected my girls' personalities.  Here is a close up of the 3 of them together.
I then, used the several of the patterned papers from the Be Loved Collection by Fancy Pants Designs to create matching monograms for each bag, and little treat boxes to go inside.
Being that my girls are all old enough to be on social media these days, and that they like to check up on me every once in a while I will only be sharing the contents of my Valentine's bags on the actual day.  Wouldn't want to ruin the surprise, sorry girls, haha.  To see how a few of the other girls on the DT have interpreted the issue, and to link up your own, hop over here, to the Paper Issues blog.  You never know, linking up, could win you a $20 gift certificate to the Paper Issues shop. **eta: I was a little ahead of the game, sorry folks.  The Issue goes live on the blog at noon EST**

And if you haven't yet gotten your hands on some Valentine's themed product for your February projects, this awesome Fancy Pants ephemera pack and much of their Be Loved collection is still available in the shop.
Don't forget everything you order will be discounted by 20% if you use code: SHERRI, and shipping is super quick, yes, even when shipping to Canada.

Thanks for stopping by today, I hope to see some of you link up on this fun Issue. Pin It

Tuesday, December 10, 2013

Chic Tags & Glitz Design

Our team at Chic Tags paired up with Glitz Design this month for a product swap.  A few of us got to play around with their Hello December collection.  The colours were a perfect match for our Good Tidings collection.  Here are 2 of my 3 projects:
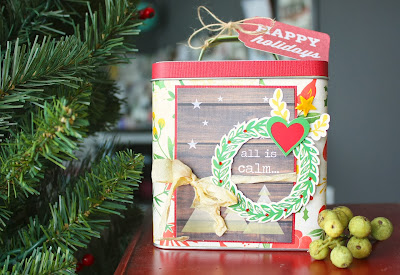
First up is this tin I altered to fill with Christmas goodies for the girls' piano teacher.
Christmas music is one of my favourite things about the season.  As soon as December 1st hits the tunes come out in full force.  I thought it might be fun to document a few of my favourite cds.  That wood grain paper is so divine.  I wish I could have a pack of it.  The starts are printed directly onto the paper.  I've placed a couple of gold rub-ons over top, but I just love this sheet, and see what I mean about the two collections matching perfectly?!

There are way more fabulous projects to see up on the Chic Tags blog as well as the Glitz Design blog. I think both teams did a fabulous job mixing and matching the two collections.  For you chance at the entire Good Tiding Collection from Chic Tags hop over here and leave a comment.  And there's also a Glitz Hello December Collection up for grabs here.

Thanks for stopping by today friends, I'll have the last of my projects to share with you next week. Pin It

Friday, November 29, 2013

My Thankful Tray

Happy Friday friends!

Here is a project I shared over on the Scraptastic Blog earlier this week.  I have never done a Printer's Tray before, but knew I wanted to attempt it when I saw Jessica's fabulous Fall kit.

That "thankful" die cut was just begging to be used on this project.  The bling behind the cardstock sticker is one from my stash, as is the teeny tiny bling on the sentiment.

I used my Silhouette Cameo to cut the Dr. Suess quote out.  

I borrowed a card from the November This Life Noted kit to add to my tray.  I thought it was perfect for documenting the date of the photo session.

And here is how my first attempt at a printer's tray turned out.
please excuse the glare I was having trouble finding just the right spot, where glare, nor shadow would affect my photo
For more inspo on using the Home Main, and Add On Kits, you should pop over to the Scraptastic Gallery, both the dt and our super talented members have great projects to share.  And to see what's coming up for December hop over to this post, but I'm warning you, be prepared to have your socks knocked off, Jessica's put together more amazing kits to get your mojo going.

Thanks for stopping by today, hope you're feeling inspired to create something great.  Oh, and you still have a couple of days to get in on my Hidden Element challenge, for your chance at a Scraptastic Shop gift certificate.  You can check out the challenge details here.

Have a wonderful weekend friends! Pin It

Monday, March 4, 2013

The Sweetest Thing

Blog Hop Giveaway extended.  Because I've got so much to share on the blog over the next couple of days.  I've decided to extend my giveaway to Thursday.  If you haven't done so, you may get in on the action here.  Winner will be announced on Friday, March 8th.

A new month a new Challenge over at Scrapping Everyday Miracles.

This month Marjolaine has challenged us to scrap about a gift we've given or received, that really touched our hearts.  It was a perfect challenge to scrap the sweet, sweet gift Théa, my 10 year old, gave us this past Valentine's Day.  After dinner that night she took off from the table and returned with two gift bags.  One marked Daddy, and one marked Mommy.  We were told we had to open them simultaneously.  Inside were these canvases.


The twist is to add bling.  Mine is yellow, so a little difficult to see.
I have been fortunate enough to receive many gifts in my lifetime, but none so sweet, and thoughtful as this.  There is just something about your child choosing to pour time and energy into something handmade especially for you.  I love that the Lord put inside of her a love for all things artsy.  It's been a real blessing watching her discover her strengths and giftings, and even more so when she chooses to use them in a way that is pleasing to the Lord.  For all the times I want to crumple over in frustration, exhaustion, or sheer bewilderment at this thing called parenting, moments like that one on Valentine's Day, make it all seem like a journey I should feel continually blessed to be on.  How about you?  What gifts have you received or given that still cause you to feel incredibly proud or grateful?

To see what the rest of the team created in the spirit of gratitude pop over to the SEM blog.  You have until March 31st to link up you own creation, and get in on a chance at lovely kit sponsored by Sue at ScrapChicKits

This will be my last post for Scrapping Everyday Miracles.  I will forever be grateful to Nicole for welcoming me onto the team in the middle of a term.  SEM is a wonderfully warm, inspiring, supportive, creative place on the web.  She has done a wonderful job of creating a place for those who love the Lord to come together, share together, and create together, all with Jesus at the centre of it.  I wish her and all the new, soon-to-be announced members of the team the very best as they carry on the vision of Scrapping Everyday Miracles.

On a happier note, please come back tomorrow for a fun announcement, I've been keeping secret for weeks, and for your chance at the best RAK I've ever offered on my blog.  It's big.  I promise you'll want in on this.

Happy Monday friends! Pin It

Wednesday, October 31, 2012

Altered memorabilia pocket


In our home we have a lot of papers/notes that need a home from time to time.  Things  like: permission slips, or fund raising forms the girls bring home from school.  There are also checks that need to be deposited, and letters/cards to be placed in the mail.  Because my fridge is stainless steel, I can no longer use magnets to simply tack things onto the front of the fridge.  We found a solution in the form of our garage access door.  It's not pretty but it works as far as tacking papers that need to be returned/mailed/signed/deposited, etc to it with magnets.  It works, but drives me crazy to look at.

Enter this Simple Stories memorabilia pocket, ribbon, pins, and stickers. 
A pretty little pocket to hold all the 'stuff'.  I simply use magnets to hold it to the door and voila, no more eye sore of a door every time I leave the house.  Cute and functional.  Thank you Simple Stories for not only creating fabulous and fun papers and embellishments for our scrapbooks, but also wonderful items like this that are mulit-funcional.

Thanks for stopping in today friends.  Have a wonderful Monday!

♥ S. Pin It

Friday, September 21, 2012

My Mind's Eye Altered Canvas

Would you believe I've had this canvas to share with you since June?

I have a girlfriend named Tish, who I met through The Scrapbook Cottage where I work.  She is an artist.  A very talented one too.  She makes the most vibrant, and beautiful art journals.  She knows how to rock Gesso, and paint, and black pens, like no one else I know.  Tish graciously took some time out of her schedule to share a little bit of her knowledge with me.

I wanted to create a canvas.  I had never done one before, but read a scripture verse that I really wanted to hang somewhere.  Shortly after finding the verse, I received a card kit in the mail, that I blogged about here.  In the kit was this fabulous wood veneer bird.  I knew I wanted that bird on a canvas.  Then along came a Scrapbook Nook kit full of the newest My Mind's Eye Indie Chic Collection.  Suddenly I had all the primary ingredients, now all I needed was the teacher.  That's where she comes in.
Why the short girl is taking the photo I'm not sure :)
I drove out to Tish's place in the country, and spent a wonderful afternoon learning from her.  Here is the vision she helped me to get on canvas.
I used a few different patterned papers, some gesso, a little paint, Studio Calico butterflies some stamps, and little trim, painted that gorgeous bird, and printed, and distressed the verse, and voila a beautiful canvas was born.

It now sits in my living room.  Thank you Tish for helping me to make my vision a reality.  I have a feeling, this won't be the only canvas I create.

♥ S. Pin It

Friday, July 20, 2012

Scrappin' Your Stash

I'm up on the Let's Capture Our Memories Blog today.

The excitement of CHA can be felt all over the scrappy web.  It's always so exciting to see what our favorite manufacturers have come up with to delight our scrappy senses.  I know I'm not the only one who struggles with balancing wanting more new goodness and using up the goodness we still have in our stash.  As much as we want to bring brand new scrappy goodness into our home, we have a slight sense of guilt over all the scrappy supplies we still have piled up, staring us in the face ever time we sit down to scrap.  For today's post, I thought it may be a good idea to showcase a couple of ideas to help us use up some of that stash to make room for some of the new CHA goodness we've got our eye on.  So I gathered up my Crate Paper Pretty Party Collection pack, and some other random supplies that have been gathering dust in my space and got to work.
First an altered tin.  Add a little Mod Podge, eliminate a few things here and there, and voila a cute little tin for my 10 year old girly, girl to keep her treasures in.


Next up a layout.

This design uses 10 different strips of paper.  It's not a new design by any means but efficient in helping you to make a dent in that stash of yours.  Have a look and you'll see what I mean.
To create this design I began by using a lightweight piece of cardboard I recycled from my pocket page protectors packaging.

I cut the piece of cardboard to 12" x 6.75".  I then marked the center point on the cardboard and drew angular lines about every two inches all the way around.
Next I sliced the pieces apart, and numbered them so that I could replicate it easily once the pieces of patterned paper were cut out.  This will also allow you to keep, and reuse the pieces over, and over again.

Because the traced pieces are always slightly larger than the original there will be a tiny bit of overlapping at the center.  This is easily covered up once you put your layout together.   I like the look of stitching on my pages, and this is a great design for it.

Remember we're trying to use up our stash, so I've layered several die cut shapes,  and boarder stickers that came with the collection around my photos.

And here is the final product.
The photos are from Tuesday when two of my longest standing friends came over for the afternoon.  It had been a long time since we'd all been together.  Hover your mouse over the photo to read the journaling.
I hope I've been able to inspire you to dig into your stash and put some of the scrappy goodness you've been hoarding, or just haven't gotten around to using, to good use.  What kinds of empty little containers have you been saving that could benefit from a little sprucing up with pretty paper, ribbon, and embellishments?  Canning jars?  Pringle tubes?  Little vases from the Dollarstore?  I'm sure you don't have to look too hard to find something.  And what about all those layouts you've been pinning, or adding to your favorites folders that use a lot of little bits of paper and tags, or die cuts, or journal spots?  Maybe it's time to lift one and make some room in your stash for the new goodness that's sure to arrive in the LCOM store within the next month or two.  If you do decide to tackle your stash I'd sure love to come and have a peek, be sure to link me up.


Happy scrapping friends!

Scrappy Goodness Used:
Crate Paper Pretty Party
Maya Road Vintage Butterflies
Maya Road Pins
Maya Road ribbon
Ormolu Chevron Tag
October Afternoon Sticky Keys
American Crafts Thickers
The Twinery Twine
3D Foam Squares
Other:
Petallo flower
May Arts Jute & Tulle
Tombow Adhesive


Pin It