Happy first of December friends!
Today I'm going to share with you the wreath I made the other day. I've been invited to play along and create something for the Christmas Inspiration Week blog hop that's going on over at
Scrapping Everyday Miracles. The request came at the perfect time as I knew I was going to make a Christmas wreath, and wanted to include a tutorial to help you make one too. I decided to go with a more contemporary look, rather than the traditional red and green.
Here are the supplies I purchased.
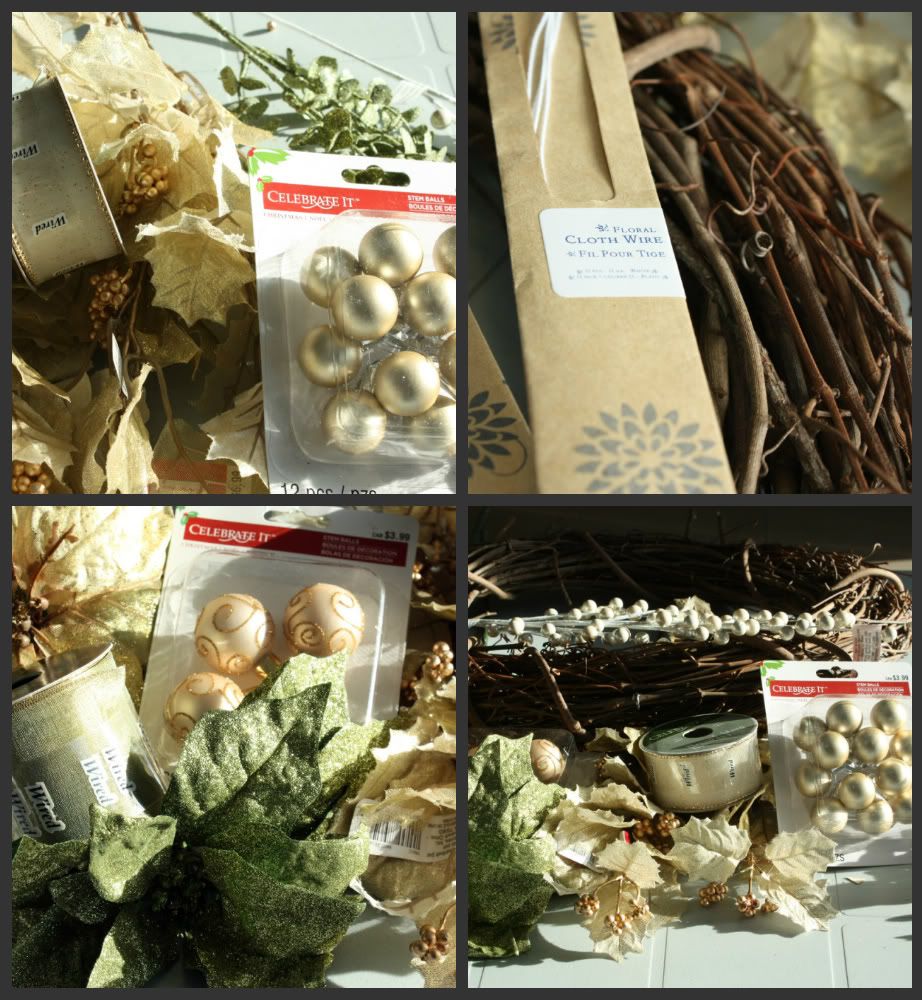 |
| In keeping with the contemporary look I chose a grapevine wreath over the evergreen. |
Those long narrow brown envelopes in the top right photo are green and white floral wire. Floral wire is really important when creating a wreath with a lot of elements, if you want them to stay securely in place for the long haul.
The first thing I did was use wire cutters to cut all the flowers, berries, and sprigs off the stems. Keeping some stems long just in case they needed to be wrapped several times.
Once I had everything cut up, I made my bow. You'll notice in the supplies collage that I bought two full spools or ribbon. I knew I wanted one large bow on the bottom of the wreath, and that requires a lot of ribbon. The other spool was to use throughout the rest of the wreath. Because I don't know how to make a 'professional' bow, I simply pulled a long strand of ribbon from the spool and began looping and gathering until I had something I liked. I then secured it together with a piece of floral wire. The loop I began with was too large for the bow. I didn't like that so I tried to create a smaller look to it by hot gluing a gold ball and some glass berries directly to the inside, center of the loop. Here's how I put them together.
They were still too small so I added another larger gold ball, and a button like this.
Still too big of a loop, so I squished the loop down, held in place with some white floral wire, then hot glued the gold button to the center. I like the final result.
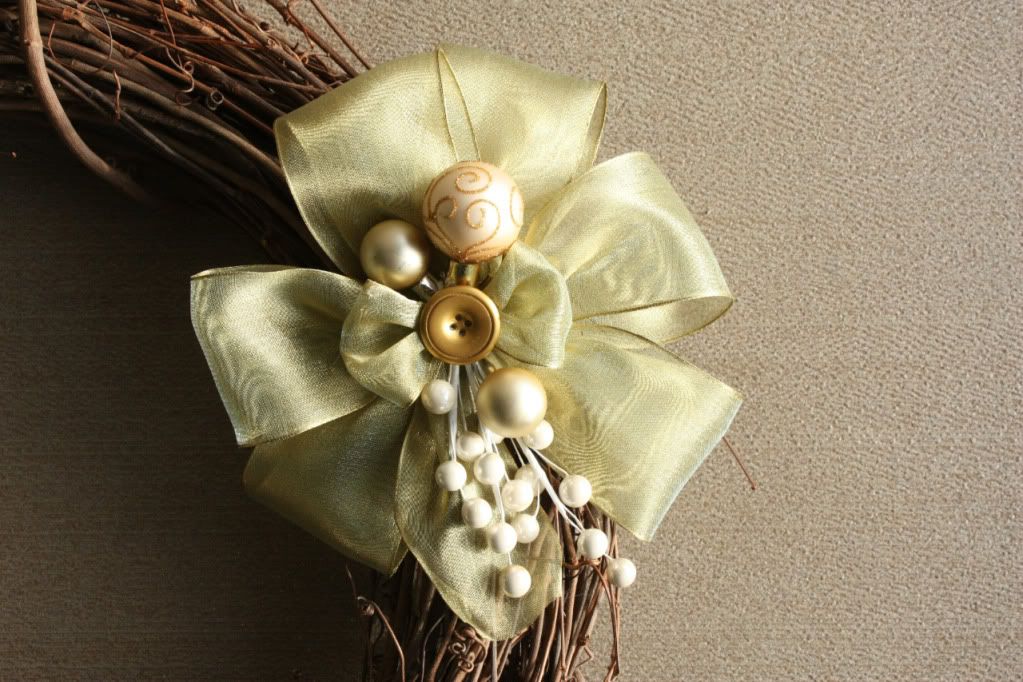 |
| I actually added a piece of felt to the back of the bow before hot gluing it to the wreath. It will help to keep the bow secure. |
When I was happy with the bow and its placement on the wreath, I began adding everything else. I started with two of the the larger flowers and built out around them. Most elements were simply stuck into the wreath like this, and secured with floral wire.
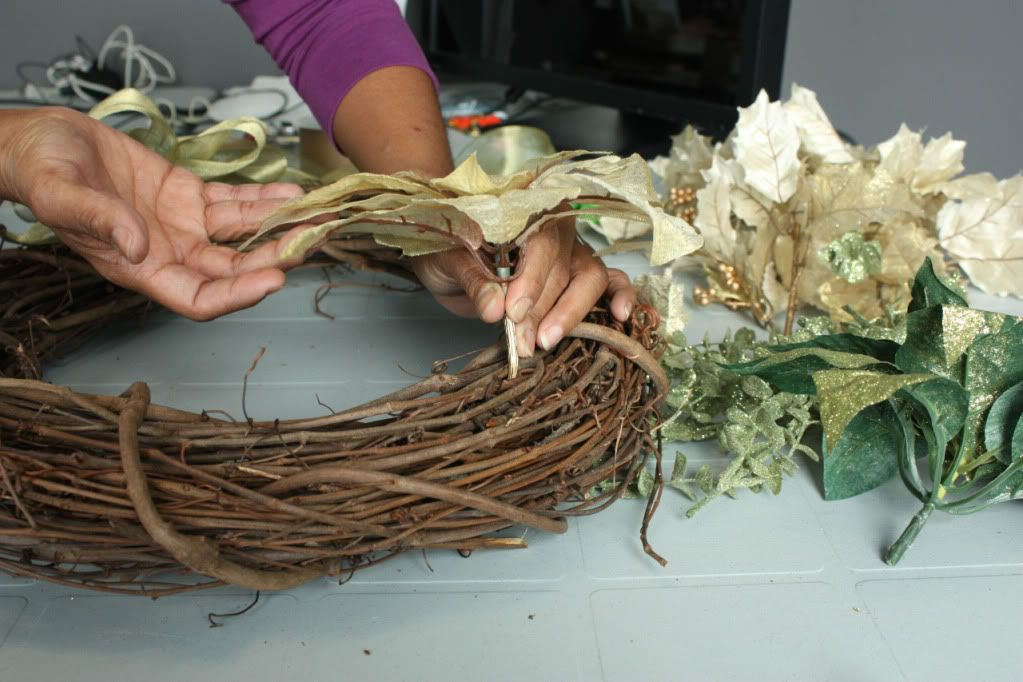 |
| See the long stem I left on. I used the floral wire to tie it down to the wreath. |
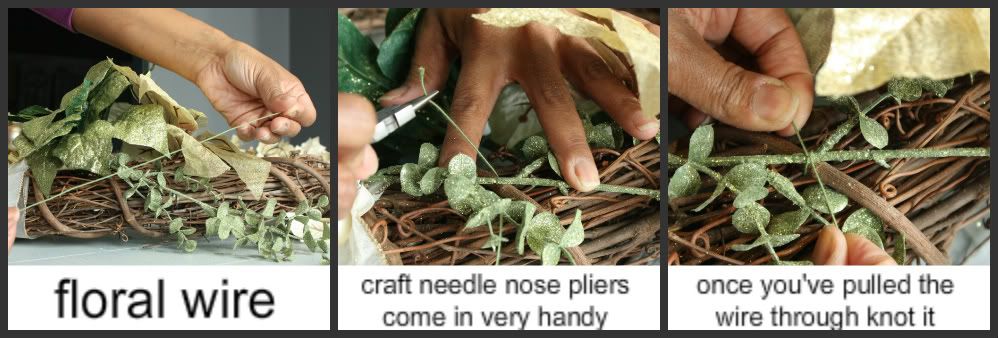
I kept adding, and securing with wire as I went, like this.
Because the floral wire is so thin it can be tricky to get back up around the vine to make a knot. Needle nose pliers work like a charm, and are a must have when working with wire.
I added a little more trim in amongst the elements also. I simply tied it directly to the wreath and added the gold balls, and berries on top of it. I snipped triangle shapes into the ends of the ribbon to add a little flaire.
Here's what I've done so far.
The final touch was to add the sprigs to the mid-right side creating balance. That was tricky and required four hands at times, simply because the sprig was so long, it needed securing at several places along the way. Hopefully you'll have someone near by. Here's the finished project. I really hope the recipient likes it.
If you've been inspired to create something crafty be sure to link me up. More importantly be sure to link up
here, on the SEM blog for your chance at that wonderful prize that's up for grabs at the end of the hop.
If you're playing along with the SEM hop (and you really should jump in on the fun, go
here to start at Day 1) Your secret word today is just as this wreath is intended to be ...
gift.
If this is your first visit, and you'd like to keep up with my crafty creations, and musing feel free to become a follower and we can keep in touch.
Thanks for stopping by today friends,
♥ S.
Pin It


13 comments:
Great job Sherri! You've become a home decor pro :) You know I have made a bunch of wreaths and never once thought about using the wire I always hot glue things - going to have to try that!
That is so fabulous, Sherri! Love it. Makes me wonder about the wreath I've had hanging on my door for one too many Christmases. HA!
Gorgeous Dear
I really love it
congrats
xx
Leila
So gorgeous!
beautiful wreath! thanks for the tutorial!
Wow, this is really beautiful, Sherri!
Thank you for sharing how you made it!
Beautiful wreath, thanks for sharing it!
Love the beauty of that wreath!!!
Wow your wreath sure was a lot of work... well done. I love how you made the bow and then tweaked it over and over... end product is gorgeous.
I am now a new follower.
Beautiful!! I like the alternate color scheme. It's very classy.
I just love this sooooo much... especially the bow with the button... Amazing Job!
Sherri, I love your wreath!! It's so beautiful. I also love the detailed instructions you shared with photos. You make it look so easy! lol Great job!!
I wish I could tie a bow that lovely. this is so pretty
Post a Comment