

Remember these?
Well I ended up making a whole bunch of them. I think the total number was twelve when all was said and done. My sweet friend Sharon loved them, thank goodness. And I did end up finding black tissue paper, finally, at a teeny tiny Dollarstore near my house. I had a few of you ask how I made them, so I thought I'd share the directions and photos with you here. You won't believe how easy they are to make.
Let's begin:
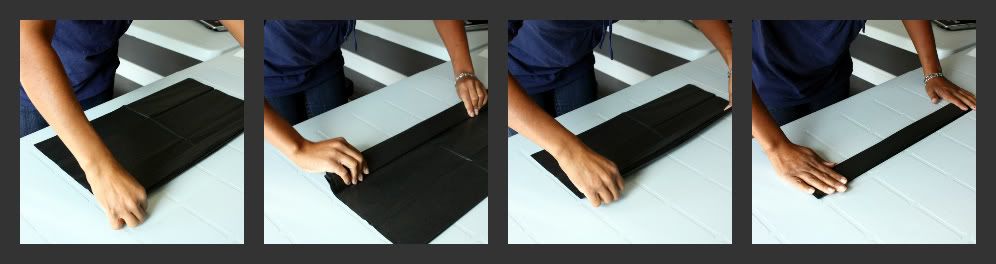
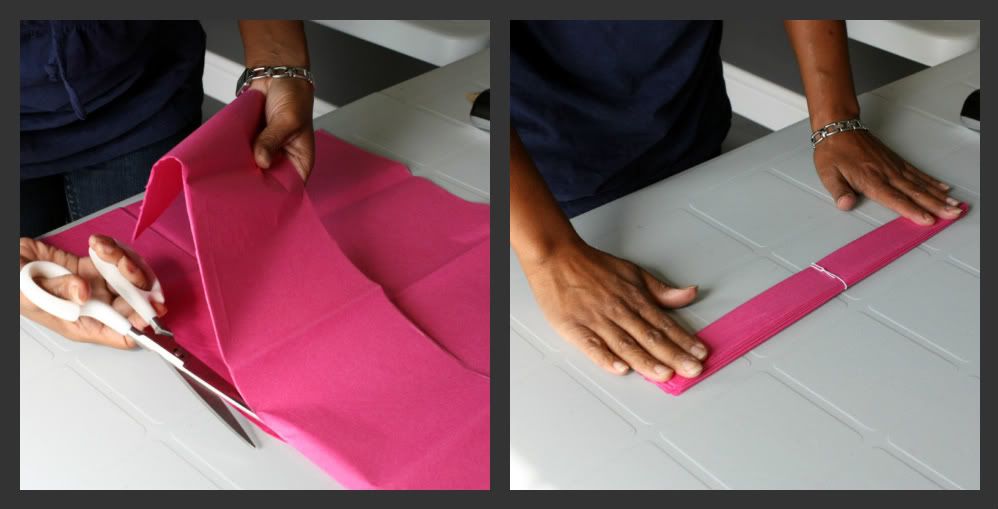
1. For the largest size pom pom, you'll need tissue paper measuring 20 inches wide by 30 inches long.
2. Begin by stacking 15 sheets of tissue paper.
3. Make a 1 1/2 inch fold in the stack of tissue.
4. Press down firmly on the edge, creating a crisp crease.
5. Continue folding the stack of tissue by 1 1/2 inches accordion style until the entire stack has been folded.
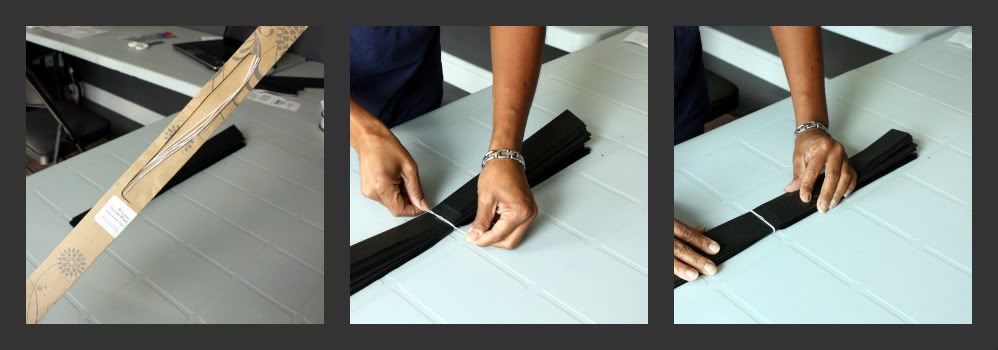
7. Place one half to the side for later use.
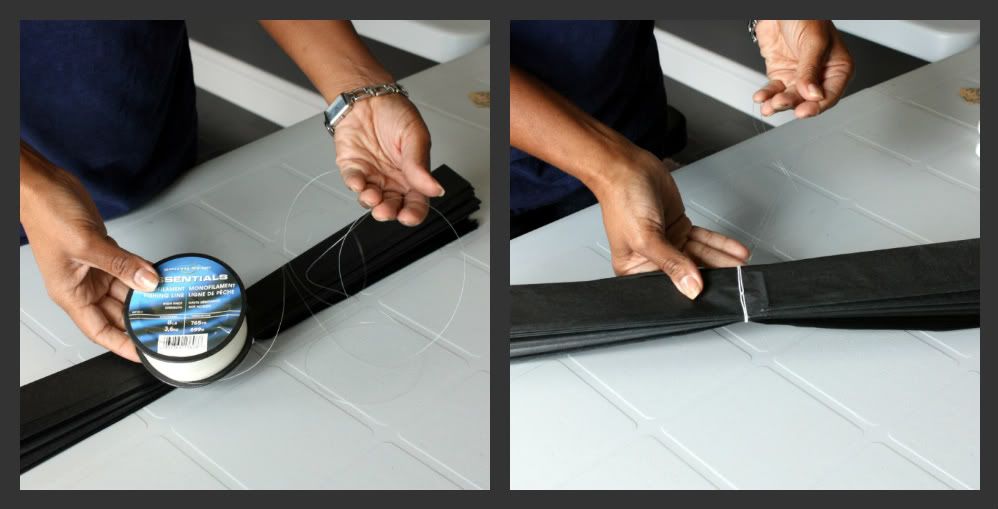
8. Use the other half to wrap around the stack of pleated tissue paper. Twist ends to hold in place.
9. Pull a good length of fishing wire through the floral wire loop. Tie the ends together. Length of the wire will depend on how far down you want the pom pom to hang from the ceiling.
10. To create a more visually appealing pom pom you may cut the ends of the stack in either a rounded or a pointed tip. I prefer the pointed like this.
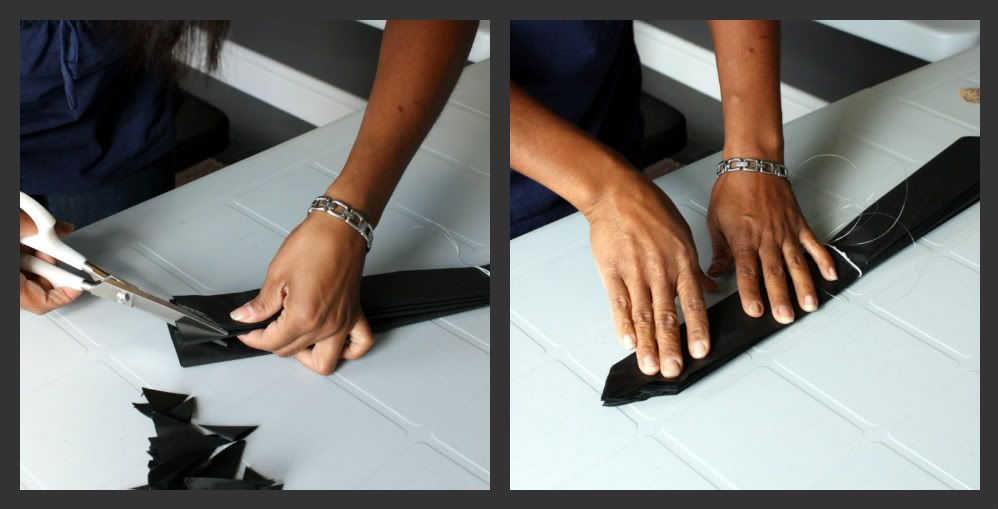
Note how I cut a few layers at a time. Because we are using so many layers it is impossible to make only two cuts. You'll find that cutting them a few layers at a time will result in an uneven look at the end. Don't worry about this as it will not be noticeable in the final result.
11. Unfold one half of the stack. Pressing it a little to flatten out the pleats a bit. This will help when separating the layers.
12. Delicately separate the layers.
Begin by separating the outer edge all the way along the width of the tissue, working your way up toward the center of the pom pom.
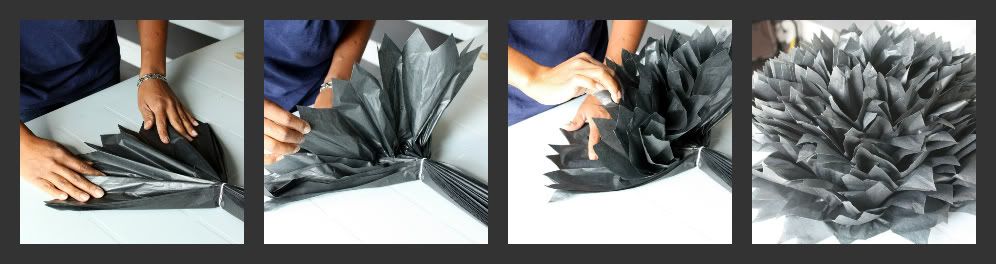
Note: work a few layers at a time, and then switch to the other side of the pom pom, working a few layers there, then switch back to the other side and do the same. Be prepared you will almost certainly rip the tissue a bit here and there. Be as gentle as possible, and don't sweat it. Again, the finished product, because of it's puffiness will pretty much hide all the imperfections created along the way. And there you have it!
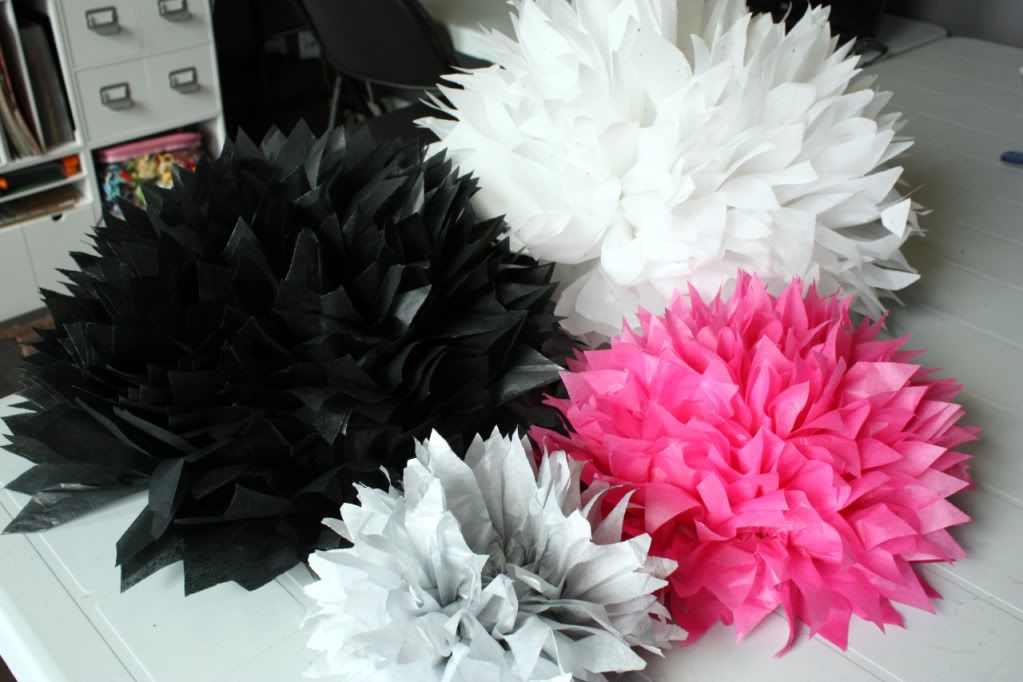
Want to create a smaller version? Simply trim a little bit off each the length and the width of your stack of tissue. Follow steps 1 through 12 once again.
The smaller the pom pom, the few sheets you may want to use. However, the least number of layers I used in my small ones was 10, I think they look really great when they're nice and puffy. Also, because mine are being hung in a store, I really wanted them to be able to stand the test of time.
Here are the various sized and colours I made.
Hope you enjoyed my little tutorial. Please link me up if you give these a try. I'd love to see your pretty puffy pom pom creations.
Later this week I hope to finally be able to share my scrappy little secret with you. Should make for a fun scrappy related weekend, yah!
Thanks for popping by today friends,
♥ S. Pin It


5 comments:
This is awesome. That you so much for posting this amazing tutorial, my friend! And I can't wait to hear about your scrappy secret, yay!!!
They are gorgeous! I will have to try! TFS!
You rock the tut!! Enjoy going thru it :) Love the colors you chose for all the pom-poms!
I always wondered how to make those! Now I know! :) Great tutorial!
Great tutorial, Sherri! I'm definitely going to try these sometime!
Post a Comment