Showing posts with label DIY. Show all posts

Thursday, May 7, 2015

Vintage Find to Wall Art

We were challenged on the Pink Paislee blog to turn our Flea Market finds into something Chic.  If you know anything about me by now, it's that I'm not really much of a Flea Market girl.  I just love the way some can take vintage and make it look so spectacularly perfect in their home.  My friend Shelley Haganman is one of the best at this.

Everyday I drive by a huge Salvation Army store on my way home from work, not only does it hold many vintage finds, but it's even located in a vintage part of the city, where many of the old structures are considered landmarks.  It was here that I discovered a couple of vintage embroidery hoops.

I gathered a handful of items from the new Pink Paislee Atlas collection, and set to work creating some wall art for my front entrance.

Keeping with the theme I chose to create a memory of our most recent trip to Universal Studios this past February.

The vellum sheet worked nicely to cover the hoop.  And then I just layered away to my heart's content.

With the smaller of the two hoops I created somewhat of a "title" piece to my frames. Notice the perfect condition the hoop is in.  They tighten like a charm.

And voilĂ , my little strip of wall has never looked so good.  Amazing what $0.50 a piece can get you.

Thanks for stopping by today friends. Pin It

Saturday, March 7, 2015

Bags & Tags *Pink Paislee*

Popping in to share my very first project over on the Pink Paislee blog this week.  I was so excited, and equally as nervous to share these.  I am still pinching myself that I am really on the team of my dreams.  So happy to be sharing the experience with all of you!

Tags, ephemera and layers, a perfect combination for embellishing any project.  You will often find each of these elements on my layouts, and pocket pages.  Today I want to take them off the page, and show you how easy it is to create gorgeous little tags for use as gift bag accents.

I love the mix of chucky and flat combined together. Pairing up that cute little polka dot frame, with a few strips from the 6x6 paper pad, and a few pieces of ephemera from the Bella Rouge collection is a quick and easy way to create a little beauty out of a plain old shipping tag.

Finish it off with a fabric flower and a few enamel dots, and you've got a sweet tag ready for that next unexpected gift.

Sometimes chunky looks even better with more chunky.  In this case, the sequin butterfly adds just the right amount of softness to the bulky layers of the fun and colourful chipboard pieces.

And here they are all prepped and ready for the next gift I have to give away.  It's like 2 gifts in one really, and who wouldn't be happy with that?

Thanks for popping by today friends!
Pin It

Wednesday, February 6, 2013

Coffee Filter Ruffles & A Winner

Happy Hump Day friends!

Last week, while searching for something to share over at Scrapping Everyday Miracles, I discovered a tutorial that I thought was so cool, I just had to try it right away: coffee Filter Ruffles.  You can see the link that I first discovered here.  I was so inspired by it, that I just had to give it a try right away so I could share it with today.

These are the images that got me so excited.
Cut the centre out of a few stacked coffee filters


To create your own ruffles follow these easy steps.  Grab a few coffee filters, and cut out the centre.  I'm saving my centres to use on another craft someday.  So I had to give it a try for myself.  I thought the ruffle layers were a little large though, so I cut them in half, both lengthwise and widthwise.

 I then grabbed a handful of Studio Calico Mr. Huey's 
and began dying the ruffles one at a time.

 End result looked like this.  I did end up adding an extra shade of green.  

You'll notice that the coverage is a little splotchy in some areas. 
I decided not to worry about it, but just to go with the flow.

Using double sided tape I covered the bottom, front of the card and began layering.  
I snipped off the parts of the ruffles that were over hanging.
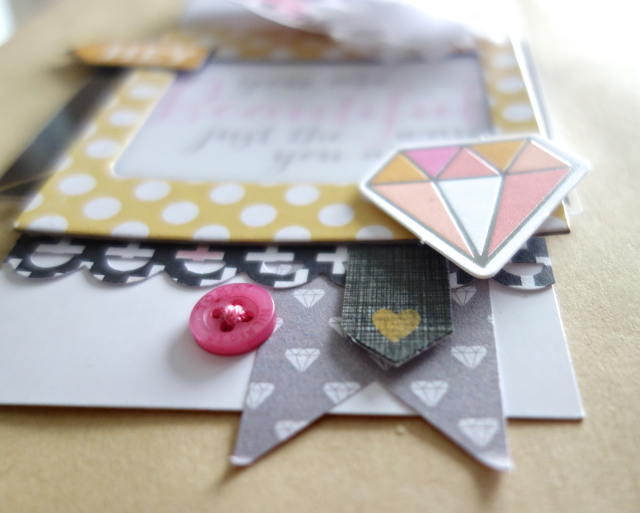
To finish it off, I simply added a couple little embellishments, 
and voila, a happy little card to add to my stash.

Have you ever seen a tip/technique or any idea that got you so excited you had to try it right away.  If so, link me up I'd love to see what inspires you.

Lastly I have a winner for my Kiwi Lane Designs blog hop.  I want to thank all of you for stopping by and commenting, and especially those that became new followers.  I hope to continue to inspire you with quality, and creative projects throughout the year.


Congratulations Valerie!  You have won my set of Tiny Accents Templates, and some fabulous Love Notes tags from Chic Tags.  Please send an email to sherrifunkATgmailDOTcom with your snail mail.  And I will get your prize out to you asap.  If I do not hear from you by Wed February 13, I will choose another winner.  Congrats again!

I am off for a quick trip to Mexico tomorrow.  Just me and my hubs, really looking forward to some time away, just the two of us.  I hope to have a few photos of sand and sun for you next week.  Until then, enjoy the rest of your week everyone, and thank you so much for stopping by today. Pin It